Tuesday, November 23, 2010

Shanty2Chic giveaway!

Shanty2Chic is giving away a Silhouette machine to one lucky reader!! Oh, I hope it is me!!

Head over to their blog and see all of their amazing creations!

Tara

Saturday, November 6, 2010

Friday, November 5, 2010

Another Great Giveaway!!

Hey!! Awesome giveaway over to Beneath My Heart by the beautiful Traci! Stop by for a chance to win a $50 giveaway! While you are there, take a look at all her creativity.

Tara

Friday, October 15, 2010

Hi Everyone!! Wow how things get crazy and then you turn around and months have passed. I am working on a few things and will hope to get it posted soon.

But I wanted to direct you to a great giveaway: Laurie over at the Tip Junkie is giving away TWO Scentsy Systems both with a Jack O’ lantern warmer and three bars of winner’s choice from Lyndsee Bates.

So head on over and register to win!! Good luck and see you soon with some cute craft stuff!

Tara

Sunday, August 22, 2010

Great Giveaway!!

Hi everyone!! I wanted to let you know about an awesome giveaway over at "Scrap with Stacy". She is giving away a plethora (I love that word) of Tim Holtz goodies! I am such a Tim Holtz junkie!

So head on over and sign up! Good luck!

Tara

Thursday, June 17, 2010

My baby is growing up!

Bittersweet is all that comes to mind. Wednesday night my 5 year old pulled ( really I pulled) his first tooth. I do not know why my babies have to lose their teeth so early. Kayla lost her first tooth right before she turned 5. We even took her to the dentist because we thougth there was no way she should be loosing a tooth so fast. The dentist showed us her x-rays and said they were ready. She is now 8 and has pulled 9 theeth.

So now Brody has lost a tooth. He is so cute. But being "all boy", he has carried his tooth around all day. I was so afraid he was going to lose it so I asked him if we could make something to put it in! This is what we came up with:


I will admit that teeth, that are not in the persons mouth, is gross. This gives him a way to carry it around and not gross me out. I do plan on putting it up for good right along Kayla's first tooth. Right now he wants to show everyone.

How I made his tooth necklace. Well, a few weeks ago I was browsing Archiver's when I spotted these Memory Capsules.

They are incredible. There are so many things I want to use these for. I used scrap paper for the backing and glued (thank you Mod Podge Amy) the paper on to a Tim Holtz fragment. Then I inserted the fragment, tooth and capsule into the memory frame.

Then I took a charm and stamped a B for Brody on it. I plan on putting it on a chain for now so he can show all of his aunts, uncles and cousins. Cute but gross, I know.

Tara

Friday, June 11, 2010

Drop Dead Diva Sunday Nite @ 9

Hi Everyone!

Just wanted to give a shout out to my Mr.Hollywood! This month we will celebrate our 10th anniversary! Wow... how the time has flown by and we have two beautiful children to show for it!

This Sunday night Jeff will debut this week on Drop Dead Diva Sunday night, June 13th at 9pm on Lifetime. This will be his first episode of three that he has filmed. He will be playing the role of Doug Resnick, an opposing lawyer to the main character Jane Bingum. You gotta watch!

You can see more information on Mr. Hollywood at:

htt...p://www.imdb.com/name/nm0741461/

http://www.jeffrose.tv/
Did I say I was proud!!

I will be back later with a beautiful ring I made with buttons!

Tara


Tuesday, June 1, 2010

Disney Family Fun Magazine

I have to be a proud mommy and boast about my baby! I was so super-excited to find the ad he shot for Dixie Products back in March in the Disney magazine I got in the mail. This is the only magazine I have seen him in so far. I am so proud of him. I spent about 2 hours under that table tickling him to get him to laugh.


Also, don't forget to set your DVR to Lifetime T.V. on Sunday June 13, when my Mr. Hollywood makes his premiere on Drop Dead Diva as lawyer Doug Resnick. He will be in 3 episodes this season (s0 far!). You can also check out a PSA (public service announcement) Mr. Hollywood did on lung cancer awareness. Did you know that 1 out 0f 17 women who do not smoke will be diagnosed with lung cancer.

Again, Mr. Hollywood playing a lawyer.


Tara

Stamped Charms

I really think it is a Southern "thing" to wear monograms. I remember as far back as elementary school wearing sweaters that were monogrammed. I even have a matching silver ring, bracelet, and pendant set my mother bought me with my initials engraved in it.

This weekend my SIL Jennifer found out that we had a Harbor Freight Tool store that was not even 20 min. from our house and that they sell metal stamps. We rushed over and I think we were drooling as we walked in and bought 2 size stamps.

We left there and of course went to Hobby Lobby, Joann's, and Michael's with coupons in hand and bought pendants to experiment with.

I bought a charm bracelet for my daughter and stamped a K on it.

I don't know if you can see it really well, but Kayla loved it. She refused to take it off last night. It made a momma happy.


Tara

Thursday, April 29, 2010

Tears of Joy!

Favors for the guest.

For those that attended the rehearsal dinner, we gave out these tears of joy tissues. I found a template that I liked from Little Miss Wedding Planner. I was able to download the template in MS Word and then change the colors to match the wedding. I used my Xyron to run the labels through and wrapped the tissues. I bought the tissues at the Dollar Tree. They come in an 8 pack for a dollar.


You can design these tissues to what ever occasion you are celebrating.

I am so happy for my brother and Nicole. Nicole, welcome to the family!!

I am linking up to Somewhat Simple, Finding Fabulous, It's FUN to craft!, Made By You Monday and The Shabby Chic Cottage.

Tara

The Head Table

Jennifer and I set up a head table for the Bride and Groom! Nicole (my new SIL) had bought these Love name place holders. They came with name place cards and we decided to make our own.

The black and white damask background for these cards were cut out of note cards bought from Michaels. Jennifer took green scrapbook paper and printed out everyone's name. Then, with the cricut and center key, we cut out the shapes around the names and then distressed the edges and glued them on the cards. Click here for the link to Jennifer's page with more instructions for the name place cards.


For the Bride and Groom, I made these paper cut-outs of a wedding dress and a tux. I found some templates online, printeded them out and put them together.


For the dress, I put the cut out through my Sizzix - Texture Boutique and then I ran the white for the tux shirt through as well. I tied ribbon around the waist of the dress and added beads and a cute decoration to the tux.

This banner was made with the cricut and so were a bunch of letter "B" for candles that lined the windows.


One more and I promise to quit!

Tara

Another Wedding Post

At the rehearsal dinner for my brother, Jennifer and I set up a photo table. This is one of the photos we set up. I bought this frame at the Dollar Tree and the glass had black printed text on it that was smeared. They gave me a discount for the frame and when I got home, cleaned the glass and it was perfect. With the cricut I use the Storybook cartridge and cut out the " A wish came true" font and glued it to the mat.


Here is a wider view of the table. We had two photo tables set up, unfortunately the table with more photos is not on my camera. I hope my little one didnt delete it.

The ferns were purchased at Lowes and we put them in galvanized tins that came from Ikea. In this bottom picture, the wooden placque that says family was made by Jennifer. You can click here to see how she made it!


On to more photos!


Tara

How can I go so long and not post!

My classes end this week and my brother is now married so maybe I will start having a little more free time to create!

On April 24th, my brother Robby, the last of the 5 kids, married his campmeeting sweetheart. You know that feeling when you JUST KNOW something is right. Well, Robby and Nicole are just right. They are so made for each other.

Many of you know that most of the time, when I have time to craft, I love to craft with my Sister (in love) Jennifer. So Together we teamed up to decorate for the rehearsal dinner.

One of the first things we did is set up a table for all of the children. Jennifer lined the table with butcher block paper so that the kids could color and draw. The galvanized pails were purchased at Ikea. We bought the pink and blue cups from Michaels. With the cricut and SCAL we cut out the names of all the children with contact paper. Im not sure how long the paper will last, but the kids loved having their own names on the cups.

From the dollar store, we purchased fun pads and pencils and put them in the pencil boxes. I really scored last year with these boxes, I got 180 of them at .10 at Office Depot. They have really come in handy to use with kids crafts. The names on the pails were printed out on white card stock paper and then using the center key on the cricut we cut them out. We inked the edges and ran the names through the xyron sticker maker and attached them to the pail. The kids were very pleased and kept them all together at the table.


This turned out to be such a wonderful treat for the kids!

Tara

Sunday, March 14, 2010

It's Me Again!

I wanted to show you something I made for a neighbor/co-worker.

Ms. Imani lives across the street from me. She is the sweetest lady. About 2 years ago she was talking with my mom about looking for a new job and I had told my mom that I had an opening in my department at work. My sweet mom hooked us up on the phone and we have worked together ever since.

Last week was Ms. Imani's birthday and I wanted to make her something. A work we are all about being crafty and frugal.

I took items I had on hand and made her this:


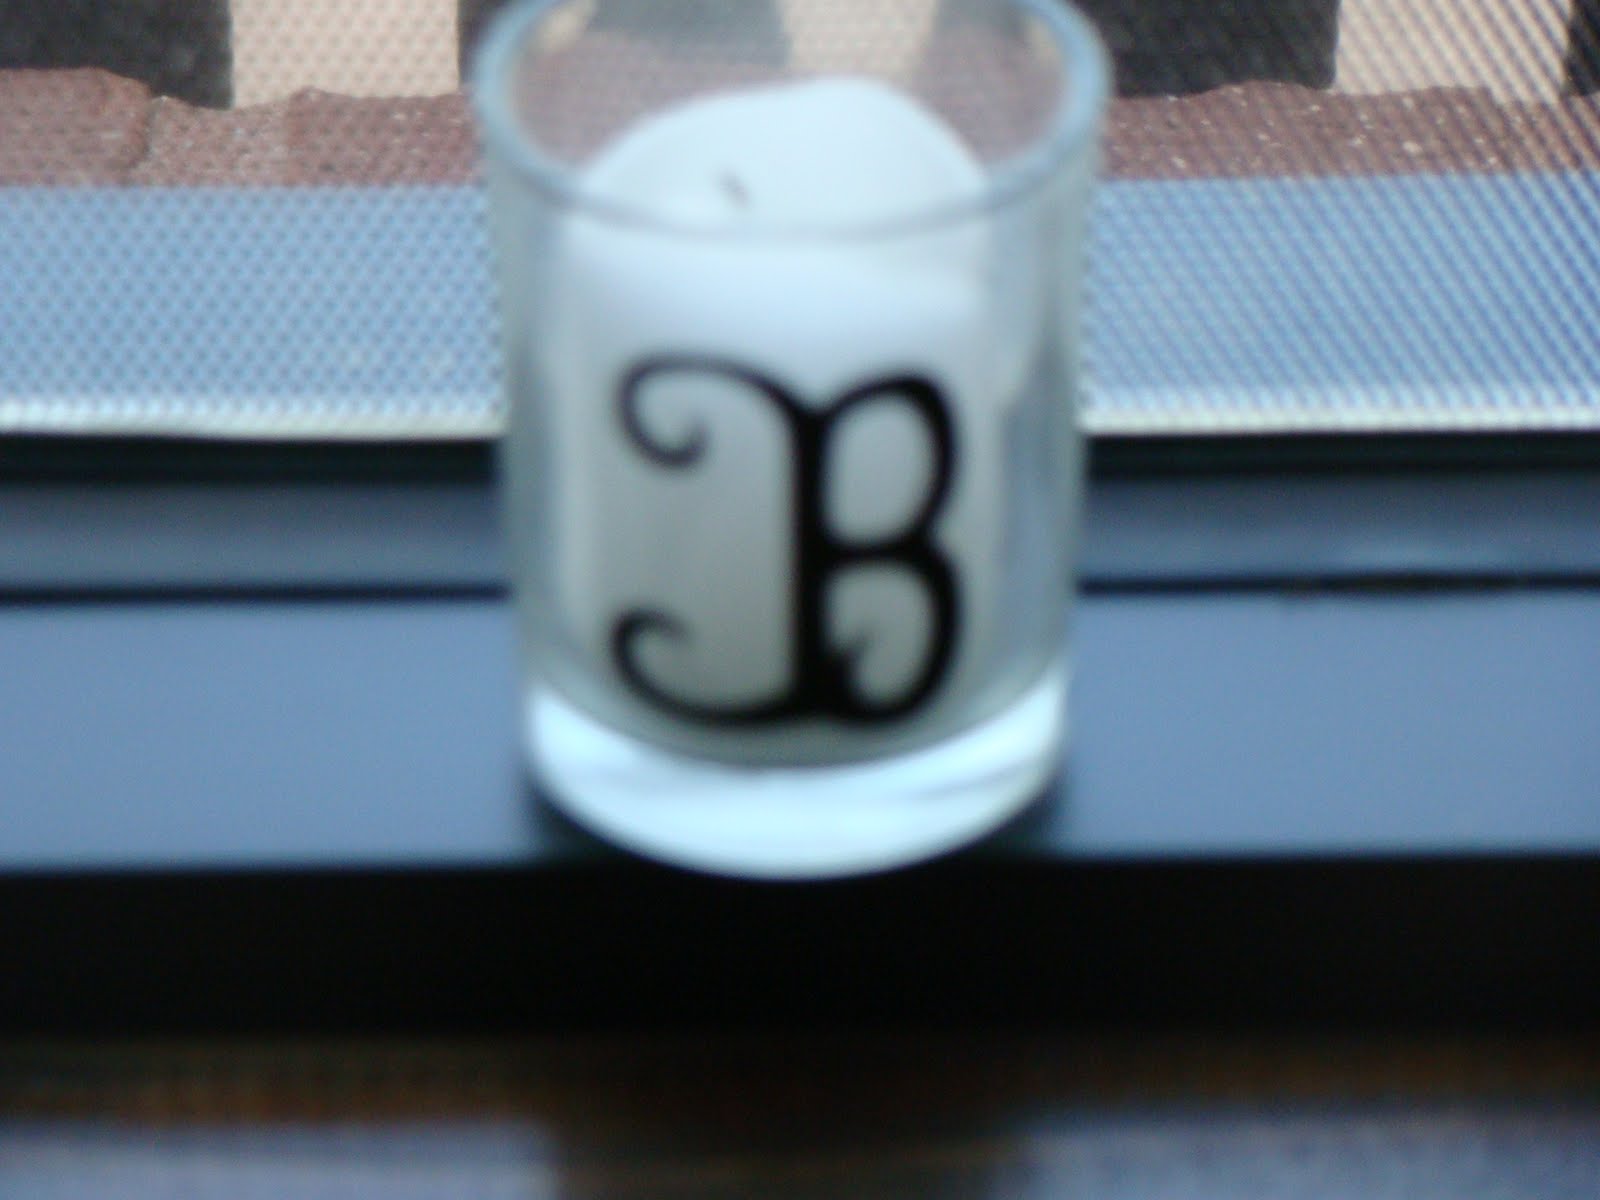
The frame came from the Dollar Tree. I love it! I had some gold metallic striped paper that I lined the back of the frame. With card stock, i cut the butterfly out with the cricut. I put the butterfly on the mat with foam dots.

I have more of these frames that I plan on using in my bathroom when we finish putting up the molding. I have two frames with both of my children silhouettes in them.


Tara

Easter Baskets

So sorry not to be blogging much. Getting closer to the end of the semester it seems that the professors try to stuff as much in as possible! Say prayers for me tonight, I am so stuffy and Mr. Hollywood has a big "Diva" job this week and I do not want to get him sick.

Looking forward to Easter, I wanted to have baskets for the kids that they could use all year long. I found these ice buckets at Target in the dollar bins (they were actually 2.50), perfect!

Then with my cricut (the greatest gift ever - last year : ) ~ I cut out my babies names. I wanted to see just how contact paper would work instead of using the vinyl sold in the cricut dept. and it seems so far to do well!

I used white contact paper bought at Wal-Mart.


I think they turned out pretty well!


Only time will tell how well these letters will hold on. Brody decided he wanted an owl on his and I put a butterfly on Kayla's.

I do hope to get more posted this week!


Tara

Monday, March 8, 2010

The DIYDish

Hey! Sorry I have been MIA. Between mid-terms, sick children, and on going work related projects, I hope to have some homemade goodies to post this week.

I have been trying to clean out my google reader tonight and I found these sisters that have a wonderful blog. Their website is called TheDIYDish. They are having a giveaway for two lucky winners (and I so need this!) of the Janome 350e Embroidery Machine and the Janome DC4030 Sewing Machine.

You should check out their video! I cant wait to make the felt flowers.


Tara


Thursday, February 18, 2010

Something Pretty for My Desk!

I like pretty things. I cant help it. I am the only girl (first born) with four brothers. I had being girly all to myself.

Two weeks ago, I went with a co-worker to our campus surplus. This is an area that houses all the furniture and unwanted nick knacks go from other offices. You basically walk in and shop around. If it is large furniture items, the guys will deliver it to you, but if it is basic desk items you can take them yourself.

I work on the computer all day. My main function is working on websites. I like to print out changes and check off items on my list as I go through them. So on this trip I was in search of a copy holder. A copy holder is a stand, metal or plastic, that will hold the document you are working on at about eye level so that you can glance at your documents rather than looking up and down. I'm sure I have one somewhere, but It never hurts to look.

Well, I found one and it was in perfect condition. It was a creamy beige color. Now to make it pretty!

This is the copyholder. See how dull.


First I took some paper out of this stack called: the Mariposa stack. Some of the most beautiful paper I have ever seen. I measured the width of the copy holder and used a paper slicer to cut to size.


Next, I ran the paper through the Xyron. I love this baby!! It puts a sticky back on the paper and you do not have to mess with Modge Podge to adhere the paper.


I fit the paper over the front of the copyholder. I took some coordinating paper and used a punch to create the scallops and ran the strips of paper through my small xyron.

Once the paper was attached I made some brads. I took my newest toy, the ITOP Brad maker and used the same butterfly coordinating paper and made some brads. I have not found the brads with the magnetic backs so I used my e6000 glue to add magnets to the back.


Last, I took a round plastic fragment from the Tim Holtz collection and glued it to the butterfly paper. There was a hole already pre-drilled in the fragment so I added two flowers and attached them with a gold brad. I glued the fragment to a bow that I attached to a magnet that came with the copy holder.


I am linking up to http://funkyjunkinteriors.blogspot.com/
http://betweennapsontheporch.blogspot.com/,
Make it for Monday @ Cottage Instincts

There you have it! Something pretty that will be sitting on my desk tomorrow!

Tara

Monday, February 15, 2010

Chalkboard paint and picture frame

Not long after Jeff and I were married I bought this picture frame. I loved it. The photo was of a distressed vase of roses. The frame was a light wood. It never really matched anything we have, but I hung it in our guest room. The guest room eventually became a nursery, and now my 5 yr -old's room. I recently found the frame in the garage and gave it a face lift.

I love this frame. I love the little ledge on the front. First I spray painted the frame with an heirloom white. While I had the back and glass out, I painted the back board with Chalkboard paint. I really didn't want to throw away the glass. I remembered I had bought some window markers on clearance with all the back to school clearance. I ended up putting the glass back in the frame and just write on the glass. The markers stand out against the black chalkboard.

The star hanging beside the frame was a 70% Halloween star from Joann's. I used some black spray paint and tied an Harlequin ribbon around it. Hanging on the hook is a tassel I bought at Hobby Lobby for 7$. It was during a 50% sale and I knew I couldn't buy the ribbon and finial for that price. I am going to start adding to the ledge. I have some 1$ picture frames that are drying from being painted that I am going to add along with some other Dollar Tree finds.


I have linked to Metamorphosis Monday @ Between Naps on the Porch, Make Your Monday@ Twice Remembered, It's So Very Cheri: It is so Renovated, Make it for Monday: @ cottage instincts! , Making the World Cuter and Made it Mondays @ The Persimmon Perch
Tara

Tuesday, February 9, 2010

Its So Very Cheri Give-a-way week 2!

Hey! If you haven't already checked out Cheri at Its So Very Cheri, then all I can say is you are missing out!
Go check her out!

Tara

Sunday, February 7, 2010

End of another long week

It is quiet in my house. I have got to focus and start studying for my classes. I can not help that all I want to do is craft!! It also does not help that my SIL is an enabler. : )

Here are some of this weeks accomplishments:

Thursday Night Jennifer and I had a craft night at her house.


Here we are with our fabulous .50 find from Michael's.


I used my cricut and Jennifer's StoryBook cartridge to cut out letters. I wanted to make a plaque for my kitchen. Here I had cut out scraps of letters to find the right fit before I cut with the vinyl.


Next, I spray painted the plaque heirloom white and once it dried I painted on some cracking paint. I did not like the color and I could not tell if I had applied the cracking paint on right so I repainted it white again and let it dry.


I took my dremel sander and went over the board scuffing it up and finished up with distressing ink. Lastly, I took my vinyl letters and added to the plaque. Here is the finished product. I love it!!!!
When I hang it up, I will post the pictures.


This week I also accomplished making:


I took a $1 picture frame from Michael's and a 1 inch punch and took another page out of my hymnl. The paper insert that was in the frame was perfect for the back ground. I just can not get enough of the Hymns.


I also added this burlap wreath to my front door. I made it today.

I added a wooden heart I bought at Joann's . I think I will just change the middle piece to change
with the seasons/holidays.


I have linked to Make Your Monday at Twice Remembered, Make it for Monday at Cottage Instincts, Metamorphosis Monday at Between Naps on the Porch, Made it Monday at The Persimmon Peach, Mom's the Word, and Making the World Cuter.

I have a few more, but I really need to go study! Take care!


Tara

Saturday, February 6, 2010

Its So Very Cheri Giveaway!!

Hey!! If you have not already entered yet you must go and do so now! The very talented Cheri at Its So Very Cheri is having an incredible week full of giveaways. Drawings will be tomorrow! You must hurry and go now, and don't just enter the giveaway look through all the amazing decor and crafts she makes.

Tara

Friday, February 5, 2010

I see blue.

I know that looking at blogs everyday overwhelms me. I see awesome decor, accessories, and crafts that you talented women make and I get so excited and ready to make things. Being that I am very impatient, I seem to start 2 or 3 things at a time and end up having 2 or 3 things unfinished for days. Life happens and the next thing I know almost a week has gone bye.

Well, this week I was supposed to go with Mr. Hollywood to Charleston while he was on set of Army Wives. I was soooooo excited. This was the first opportunity for me to be able to go. I had my Mom keeping the kids and I had taken some days off of work. Then on Saturday we found out that he would be needed for an extra day and that caused me to cancel my plans. OH well.... maybe next time (I say that every time).


Here he is with Wendy Davis (Joan Burton) and Veronika Dominczyk (Brenda Foster) on the set.


While he was gone, I did manage to get Kayla's bookshelf finished.

I had first seen the bookshelves here by Traci at Beneath My Heart.

Then I found the plans by Ana at Knock Off Wood . I took her measurements and sent Mr. Hollywood to HomeDepot to get the wood. I was able to use my jig saw having so much fun.

I let Kayla pick out the color for the shelf. This was so easy and so much fun. I bought the letter K at Joanns (with a coupon) and took some paper I had and glued it to the front. Tomorrow I am going to add cup hooks to the bottom for Kayla to hang her book bag and coat. I will add new pictures once the shelf is on the wall.


I will be linking this up to others posts shortly. Going to go spend what is left of the night with my family!


I have linked to My Romantic Home for Show and Tell Friday and Saturday Night Special at Funky Junk Interior.


Congratulations to my SIL Jennifer at All things pink and crafty for winning the Just Simply Southern giveaway over at Beneath my heart

Tara


Sunday, January 31, 2010

Hymns

To me, there is nothing more beautiful than the sound of old hymns. I have attended church all of my life and every summer I still go to church camp. When some classic hymns begin to play, I can close my eyes and hear my Mammy (my grandmother) and Granddaddy singing them with joy. When I hear other hymns, I listen and cry because as a baby my Dad would rock me to sleep singing and humming them. That makes me miss him so much. My dad had such a beautiful voice. He sang like an angel.

My Mammy used to sing me those hymns while I sat beside her at her piano. I still own that piano. Since my SIL and I have been working to beautify my Mom's entrance-way, we recently moved my Mammy's piano to that very spot. After seeing the Living with Lindsay's tutorial, I made a wreath to hang by the piano. I used the pages of an old hymnal that my brother gave me. I distressed the edges and attached the pages to the wreath, bringing back floods of great memories every time we come through Mom's door.

I'll add photos soon!

This week my SIL at All Things Pink and Crafty made my Mom decorative blocks that spell the word T-R-U-S-T using more hymn pages. My Mom's favorite scripture is "Trust in the Lord with All Your Heart". Right now Mom is leaning on HIM as she watches her best friend of 44 years battle pancreatic cancer. Please keep Judy in your prayers.


I hope my Mom doesn't read this yet, but I made her these coasters to go along with the wreath and blocks. She hasn't received these yet. I am waiting for the sealant to dry.

I used some of my favorite hymns ("How Firm a Foundation", "Rock of Ages"...one my dad would hum me to sleep with..."Victory in Jesus", and "Wonderful Grace of Jesus"). I applied the pages to tile with Mod Podge and used a roller to get rid of any bubbles. I distressed the edges with black distressing ink. I applied two more coats of Mod Podge and let dry. I hope she loves them. I want to make more for her cabin at church camp.

I plan on posting more projects this week. I built a bookshelf and the paint is drying in the garage. I still need to put the finishing touches on my bathroom.

Mr. Hollywood and I are driving to Charleston this week. He is shooting yet another episode of "Army Wives". Stay tuned to find out what happened to Major Ogden and Colonel Burton at the end of season 3. (I know...but I can't tell!) Hehehehe ;o)

I am linking up to The Twice Remembered Cottage for Make it Your Monday, Between Naps on the Porch, and Funky Junk Interiors.


Tara

Wednesday, January 27, 2010

The one time I stopped to read directions, still didn't turn out!

I know I am the only one that jumps into projects with out reading the directions. I cant help it. I figure the directions are there if I can't figure it out first. :)

I am so proud of myself, I went out and bought a Jig Saw. I have been wanting to build something, ignoring the fact I have 2 quizzes and a project due Sunday, I still wanted to build ~ it's in my blood. I saw these incredible shelves at Knock Off Wood and at Beneath My Heart and I assumed I could do that, It looked kinda easy, but I need a saw to make "Curves".

I did my Home Depot and Lowe's homework and found a saw that would work for me. I brought it home admired it and got charged. I had to go back to home depot because I wanted to do this right and needed to get Curve cutting blade. I brought the blade home and started reading the directions. Since I work on a computer all day I need to keep my fingers so I wanted to make sure I inserted the blade and knew how to work the machine. Not having my dad around to help me I try to be a little more careful.... So anyway, I go out to the garage, clamp down my pre-cut wood and make the cutest little curves. I was so proud. I hammered those little guys to the side and I could feel life's frustrations pound away -- until, I realized the HD guy cut the slats too short for the front of the book shelf.

GRRR....., my now frustration had turned to anger as I pulled the planks apart. I don't want to go back to HD. Maybe tomorrow night I can cut the shelf a little shorter. By then I should have some pictures to post!

Tara

Sunday, January 24, 2010

I'm back with a finished product!!

I have the babies in bed, and asleep. I have had my shower and finished my quiz, 100%. Now I am in the bed, my office :( , and ready to post.

Almost everyday one of my two babies either draws me something at school, at Sunday School, children's church or just doodling at home. My fridge is covered in drawings, that eventually fall on the floor and usually end in the trash. I have no place for stuff!!

While looking around on a blog I have in my reader I stumbled upon another blog called Brown Paper Packages. Being curious, I did some looking around and found these art clip boards. How cool and easy do these look like to make, so I did.

I bought a piece of 1x2x36 from Joann's, with a coupon, and also some small clothes pins.


I measured the board and cut it in half with my dremel. Next, I spray painted both pieces of board and 6 clothes pins, front and back in black. After they had all dried, i measured the boards again and drilled small holes.

I took some burlap like ribbon I bought off the target Christmas clearence and threadded it through the holes and knotted the ends.


To decorate the clothes pins I cut small strips of paper and fed the pieces through my xyron sticker maker and attached them to the front of the clothe pins. So easy!


I attached the clothes pins to the boards with E6000 glue. When the glue dried, i took some small embellishments i printed off of the cricut, threaded them through the xyron sticker maker and added them for decoration.


Here are the finished products!


Don't know if I like the ribbon??
What do you think??


I am linking this post to Power of Paint Party at Domestically Speaking on Wednesday,
Make Your Monday at Twice Remembered , Make it for Monday at Cottage Instincts, Just Something I Whipped Up every Monday at the Girl Creative, Its So Very Cheri and Metamorphosis Monday at Between Naps on the porch !


Tara!

Wednesday, January 20, 2010

Don't Give Up on Me Yet

Sorry I have not posted in a few days. I was so gung-ho when I started this blog. I missed work today because I had a migrane last night and this morning I was useless. Mr. Hollywood (aka Husband) got the kids up and off to school. I got up just to make sure they had everthing. Now, usually when I get up I am up, but I told myself I would lay back down for a few more minutes. The next thing I knew it was 12:00 pm.

I had planned to put on a roast and do homework, now the morning was gone. I guess the Lord knew I need the rest.

Supper is finished, and the kids are in bed while being told stories of the Hobbit. I am back to homework.... blah! I have some projects drying in the garage and will promise to post something soon. Just dont give up on me. Im tring to find balance : )

Oh, by the way, I did get quite a large of free 90's scrap fabric from some nice lady over the weekend. Gotta love the freecycle.

Tara

Friday, January 15, 2010

Coasters

During this last Christmas, a group of ladies from work decided to exchange homemade/handmade gifts. I had seen several blogs of handmade coasters and gave it a try.

I had seen Traci @ Beneath My Heart use decorative napkins and made beautiful coasters. I encourage anyone that has not visited her blog to do so. She is so talented and beautiful. She has no idea how much she has inspired me.

I started with white tiles bought at Lowe's, 2 matching scrapbook papers cut to tile size, modpodge, a brush, roller, acrylic sealer and felt.


I began by coating each tile with modpodge and then covered the tile with the paper. I cut the paper to fit just on top of the tile. I did not cover the sides. I ended up trimming some of the sides.


Once a little dry, I took my roller and pressed the paper to get rid of any bubbles. The roller I bought at Lowe's.


After the tiles dried, I gave them a second coat of modpodge.


After they had completely dried, I took a nail file and sanded around the edges. This helps the coasters from not looking like I just slapped paper on it.


Then I took my distressing ink and coated the edges of the paper and sides of the coasters. I would put the ink on really wet and then wipe it off with a paper towel.
The ink gave the tile almost a wood look to it.


After the ink had dried, I took the tiles out into the garage and sprayed them with an acrylic sealer. I applied about three coats of sealer, letting them dry in between coats.


I wrapped a pretty bow around them and was finished. They turned out so beautiful. I cant wait to make more.


I have linked up with Funky Junk Interiors, Between Nap on the Porch, Twice Remembered and the DIY showoff


Check out the site for more great ideas!
Tara